
Bathroom Remodel ROI in Massachusetts: Does It Add Resale Value?
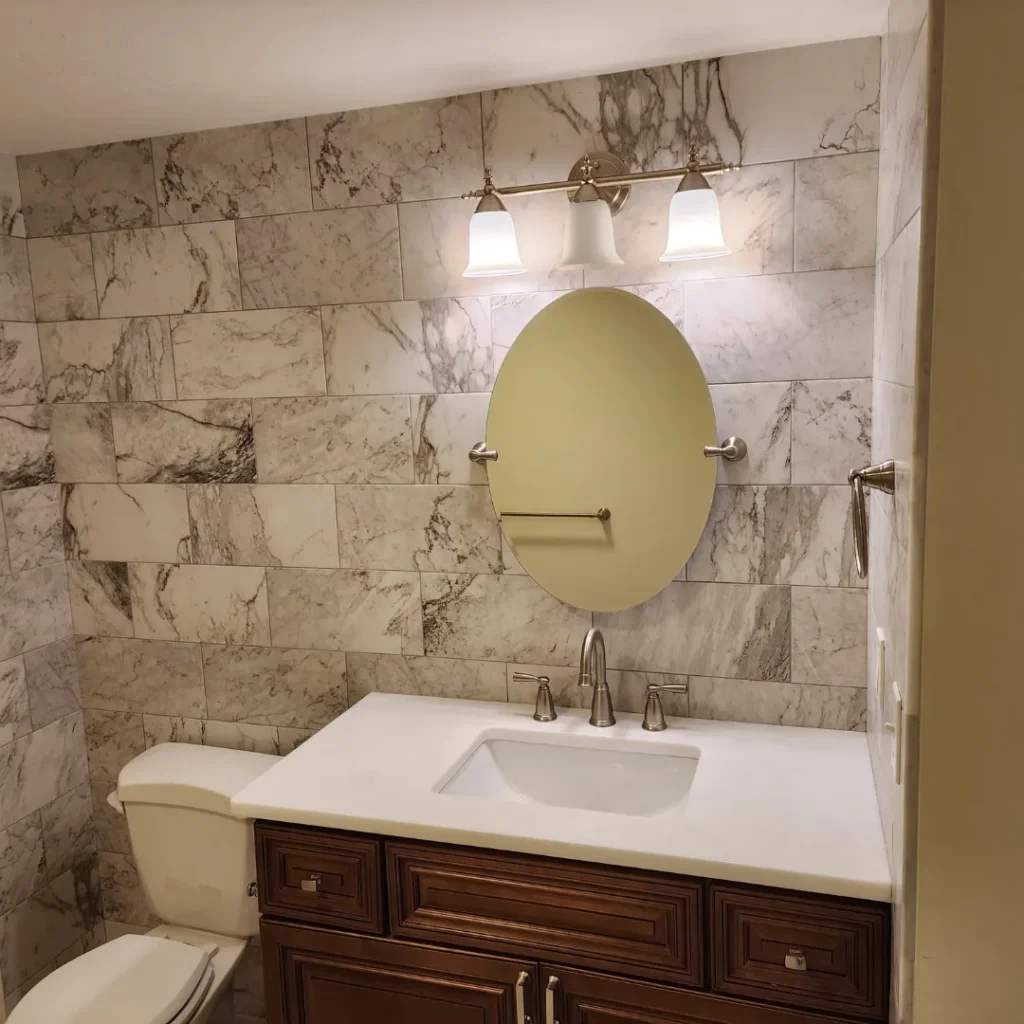
Maximize your home’s value with a bathroom remodel in Massachusetts. Learn about ROI and get a free, no-obligation quote from our insured experts today!
Kitchen Renovation in Worcester County: Cabinets, Counters & Timeline
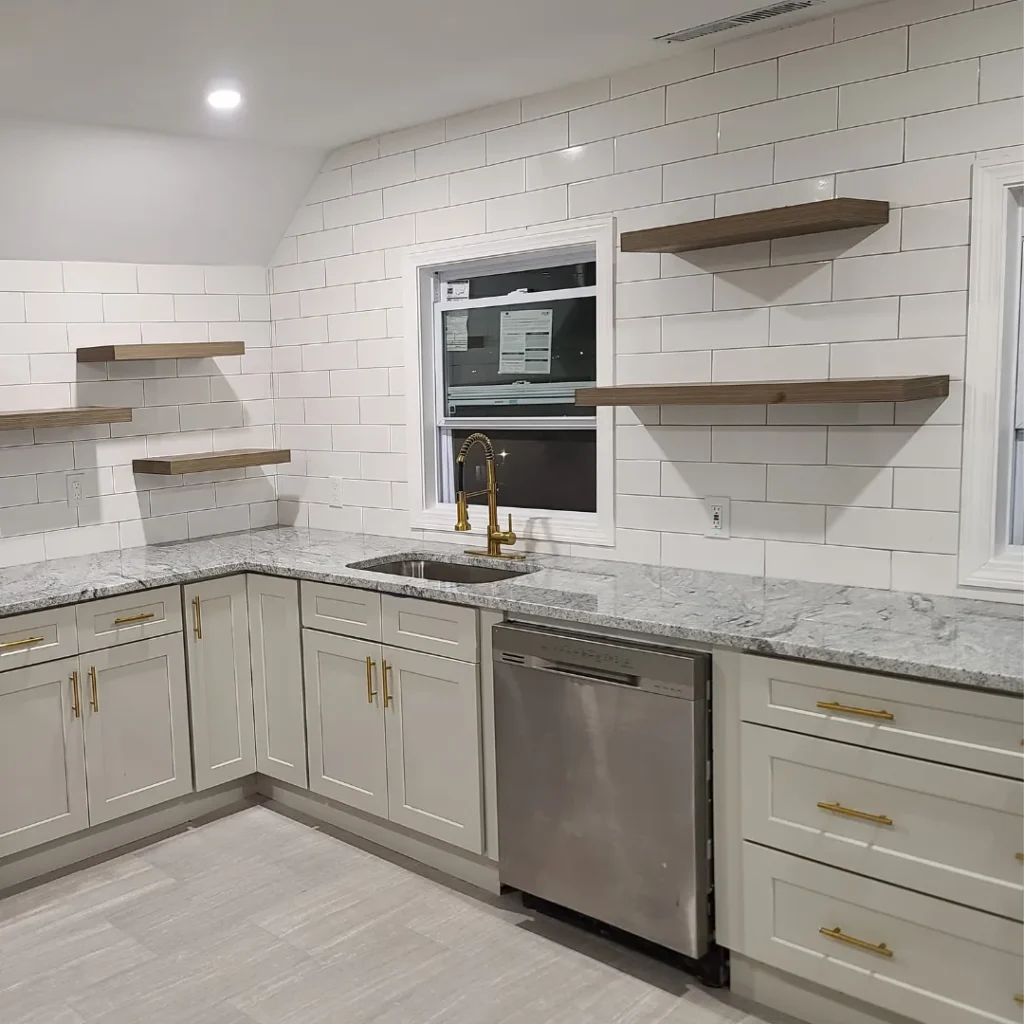
Blog Kitchen Renovation in Worcester County: Cabinets, Counters & Timeline Serving homeowners in Worcester County, MA and surrounding areas A kitchen renovation in Worcester County is more than just an aesthetic upgrade; it’s an investment in your home’s functionality, value, and your daily quality of life. From selecting the perfect cabinets and durable countertops to understanding the project timeline, careful planning is key to a successful outcome. This guide walks you through the essential elements of a kitchen remodel in Central Massachusetts, helping you navigate decisions around design, materials, and what to expect during the process. We aim to equip you with the knowledge to create a kitchen that perfectly suits your needs and style. Ready to start your kitchen transformation? Discover how we can bring your vision to life, including our special offer: Free Demolition + Renovations Under $10,000*. Get Free Quote Planning Your Worcester County Kitchen Renovation Embarking on a kitchen renovation in Worcester County requires thoughtful consideration of several factors beyond just aesthetics. Understanding the scope, setting a realistic budget, and making informed design choices are crucial first steps to ensure your project runs smoothly and meets your expectations. Setting a Realistic Budget for Your Kitchen Remodel The cost of a kitchen renovation can vary significantly based on its scope, material choices, and labor. A minor refresh might involve painting cabinets and updating fixtures, while a major remodel could include reconfiguring the layout, replacing all components, and even structural changes. According to industry reports, a mid-range kitchen remodel in the Northeast can average between $30,000 and $70,000*, while an upscale renovation can exceed $90,000 to $150,000* or more. These figures are general market references and depend heavily on individual choices. Minor refresh: Often focuses on cosmetic updates like paint, hardware, and new appliances. Mid-range remodel: Typically includes new semi-custom cabinets, laminate countertops, new flooring, and a standard sink. Major remodel: Involves custom cabinets, high-end countertops (like quartz or granite), new lighting, and potentially moving walls or plumbing. *Pricing varies based on project scope, materials selected, and site conditions. Contact us for a personalized estimate. Design & Layout Considerations for Massachusetts Homes The layout of your kitchen profoundly impacts its functionality and flow. Popular layouts include the galley kitchen, L-shape, U-shape, and kitchens with islands. When planning your layout, consider the “work triangle” (the path between the sink, refrigerator, and stove) for optimal efficiency. In many Worcester County homes, an open-concept design continues to be highly sought after, blending the kitchen seamlessly with living or dining areas. This often involves removing walls to create a more spacious and inviting environment, perfect for entertaining and family gatherings. Functionality: How do you use your kitchen daily? Cooking, entertaining, family meals? Traffic flow: Ensure clear pathways, especially around major appliances and seating areas. Storage needs: Plan for adequate pantry space, specialized drawers, and cabinet organizers. Cabinets: The Foundation of Your Kitchen’s Style Cabinets are not just storage solutions; they define the aesthetic of your kitchen. Choosing the right style, material, and finish is crucial for achieving your desired look and ensuring durability. We offer comprehensive kitchen renovation services, including expert cabinet selection and installation, to homes across the region. Types of Cabinets and Materials Kitchen cabinets generally fall into three categories: stock, semi-custom, and custom. Stock cabinets are pre-made and cost-effective but offer limited sizes and finishes. Semi-custom cabinets provide more options for sizing, styles, and finishes, allowing for greater personalization. Custom cabinets are built specifically for your kitchen, offering unlimited design flexibility and maximizing every inch of space, albeit at a higher cost*. Common materials include solid wood (maple, cherry, oak), MDF (medium-density fiberboard) for painted finishes, and thermofoil for a durable, easy-to-clean surface. *Pricing varies based on project scope, materials selected, and site conditions. Contact us for a personalized estimate. Popular Cabinet Trends in Central Massachusetts In Worcester County, homeowners often lean towards timeless styles with modern touches. Shaker-style cabinets remain a classic favorite due to their clean lines and versatility. Two-tone kitchens, featuring different colored upper and lower cabinets or an island in a contrasting shade, are also gaining popularity, adding visual interest and depth. Integrated storage solutions, such as pull-out pantries, lazy Susans, and drawer organizers, are essential for maximizing efficiency and keeping your kitchen clutter-free. A modern gray shaker kitchen featuring a quartz waterfall island and dark mosaic backsplash, a popular choice for homeowners in Shrewsbury, MA. Countertops: Durability Meets Aesthetics Countertops are a significant visual element in your kitchen and must withstand daily use. Selecting the right material involves balancing appearance, durability, maintenance, and budget. Common Countertop Materials The market offers a wide array of countertop materials, each with unique characteristics: Quartz: Engineered stone offering exceptional durability, resistance to scratches and stains, and a wide range of colors and patterns. It’s non-porous, making it very hygienic and low maintenance. Granite: Natural stone known for its unique patterns, heat resistance, and durability. Requires periodic sealing to prevent staining. Laminate: An affordable option with a vast selection of colors and patterns, including those mimicking natural stone or wood. It’s easy to clean but less heat and scratch resistant than stone. Butcher Block: Offers a warm, natural look, perfect for cutting and food prep. Requires regular oiling and sealing to maintain its appearance and prevent damage. According to the National Kitchen and Bath Association (NKBA), quartz and granite consistently rank as the top choices for kitchen countertops due to their blend of beauty and resilience, often lasting 20-30 years with proper care. Choosing the Right Countertop for Your Lifestyle Your lifestyle should heavily influence your countertop choice. If you’re an avid cook, heat and scratch resistance might be paramount, making granite or quartz ideal. For busy families, low-maintenance, stain-resistant options like quartz are often preferred. Budget considerations also play a role, with laminate offering a cost-effective solution without sacrificing style, while natural stones and engineered quartz represent a higher investment*. *Pricing varies based on project scope, materials selected, and site conditions. Contact us for a personalized estimate.
The Ultimate Checklist for Your Next Home Remodeling Project in Auburn
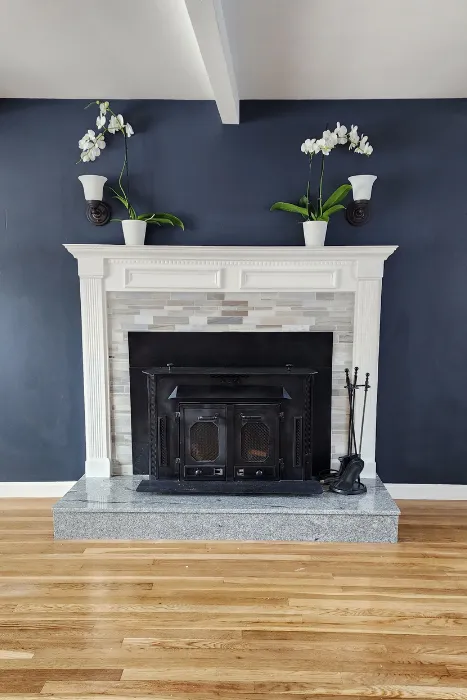
Blog The Ultimate Checklist for Your Next Home Remodeling Project in Auburn Serving homeowners in Auburn, MA and surrounding areas Embarking on a home remodeling project in Auburn, MA, can be an exciting journey, but it requires careful planning to ensure a smooth and successful outcome. A comprehensive home remodeling checklist Auburn homeowners can rely on is crucial for staying organized, managing expectations, and avoiding common pitfalls. From initial design concepts to the final touches, a detailed checklist helps you navigate each stage with confidence. This guide will walk you through the essential steps, providing insights and tips to make your renovation dreams a reality. Ready to start your Auburn home remodel? Get a personalized plan and a free quote from our experienced team. We’re offering Free Demolition + Renovations Under $10,000*! Get Free Quote *Pricing varies based on project scope, materials selected, and site conditions. Contact us for a personalized estimate. Your Essential Home Remodeling Checklist for Auburn, MA A successful home remodeling project, especially in a vibrant community like Auburn, MA, starts long before the first hammer swings. This comprehensive home remodeling checklist Auburn residents can use covers everything from vision to completion, ensuring every detail is considered. 1. Define Your Vision and Goals Before anything else, clearly articulate what you want to achieve with your remodel. Are you looking to update a kitchen, create a more functional bathroom, or expand your living space? Identify Needs vs. Wants: Distinguish between essential upgrades and desired luxuries. This helps prioritize and manage your budget. Gather Inspiration: Collect images, ideas, and styles you love. Houzz, Pinterest, and design magazines are great resources. Consider Future Plans: Think about how long you plan to stay in your Auburn home. This impacts material choices and overall investment. 2. Set a Realistic Budget One of the most critical steps in any home remodeling checklist Auburn homeowners face is establishing a clear budget. Remodeling costs can fluctuate significantly based on materials, labor, and unexpected issues. Allocate Funds: Break down your budget into categories like design fees, materials, labor, permits, and a contingency fund (typically 10-20% of the total budget for unforeseen expenses). Research Material Costs: Get a sense of what different materials cost. For example, national bathroom remodels typically run $15,000–$40,000*, but this can vary widely. Get Multiple Quotes: Contact several reputable contractors for detailed estimates. This helps you understand market rates and find a team that aligns with your budget. *Pricing varies based on project scope, materials selected, and site conditions. Contact us for a personalized estimate. A well-planned kitchen remodel can transform your living space, combining aesthetics with functionality. 3. Hire the Right Professionals Choosing the right team is paramount for a successful home remodel. For your home remodeling checklist Auburn, look for experienced and licensed professionals. Interview Contractors: Look for contractors with a strong portfolio, positive references, and clear communication. Ensure they are a Massachusetts Home Improvement Contractor (HIC #217695). Verify Licenses and Insurance: Always check that your contractor is licensed and carries proper insurance to protect you from liability. Review Contracts Carefully: Ensure the contract includes all project details, timelines, payment schedules, and a clear change order process. 4. Design and Planning Phase This is where your vision truly starts to take shape. Detailed design and planning prevent costly changes down the line. Architectural Drawings/Blueprints: For larger projects, a professional architect or designer will create detailed plans. Material Selection: Choose all finishes, fixtures, and materials. This includes tile, flooring, paint colors, cabinets, countertops, and lighting. Permits and Regulations: Your contractor should handle obtaining all necessary permits from the town of Auburn. This ensures your project complies with local building codes. Upgrading your bathroom with modern tiles and fixtures can significantly enhance comfort and home value. 5. Project Execution and Management Once everything is planned, the physical work begins. Effective communication and oversight are key during this stage. Clear Communication: Maintain open lines of communication with your contractor. Schedule regular check-ins to discuss progress and any potential issues. Site Preparation: Ensure your home is ready for construction. This might involve protecting furniture, setting up dust barriers, and clearing access paths. Stay Flexible: Be prepared for minor adjustments. Remodeling often uncovers unforeseen issues, especially in older homes. A good contractor will communicate these promptly. 6. Final Walkthrough and Completion The end of the project is in sight! This final stage ensures everything meets your expectations. Punch List: Conduct a thorough walkthrough with your contractor to identify any outstanding items or touch-ups needed. This is known as a “punch list.” Final Inspections: Ensure all necessary final inspections are completed and approved by local authorities. Warranty and Maintenance: Collect all product warranties and maintenance instructions for new appliances and materials. A fresh coat of paint and updated trim can dramatically brighten any room. Why a Detailed Checklist Matters for Your Auburn Home A detailed home remodeling checklist for your Auburn project offers numerous benefits, from saving money to reducing stress. According to a study by the National Association of Home Builders, well-planned remodels are 30% more likely to stay on budget and schedule. Budget Control: By outlining every expense, you can track spending and avoid costly overruns. Time Management: A clear timeline helps keep the project on schedule and minimizes disruption to your daily life. Reduced Stress: Knowing what to expect at each stage reduces anxiety and allows you to enjoy the transformation process. Quality Assurance: A checklist ensures that all details, from permits to final inspections, are addressed, leading to a high-quality finished product. Better Communication: It serves as a shared roadmap for you and your contractor, fostering clear communication and mutual understanding. Pro Tip: Don’t underestimate the value of a contingency fund. Unexpected issues, like discovering old plumbing or electrical problems, are common in remodels, especially in older Auburn homes. Aim for 15-20% of your total budget. Maximizing Value in Your Auburn Remodel While a remodel is an investment, smart choices can maximize its return, particularly in the competitive Auburn real estate market.
Is Floor Refinishing Right for Your Worcester Home? Pros and Cons
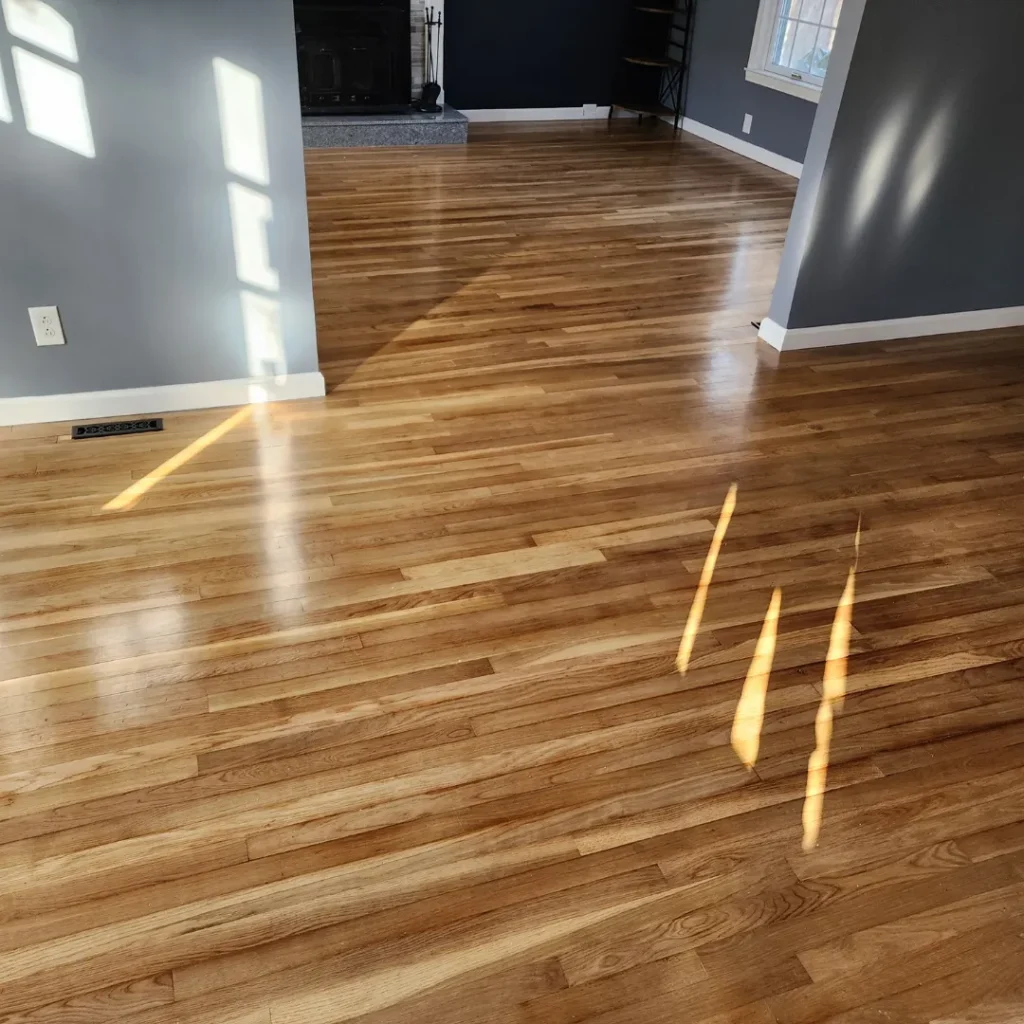
Blog Is Floor Refinishing Right for Your Worcester Home? Pros and Cons Serving homeowners in Worcester, MA and surrounding areas Considering floor refinishing for your Worcester home? Hardwood floors offer timeless beauty and can significantly enhance your property’s value. However, over time, even the most resilient hardwoods can show signs of wear and tear, from scratches and dullness to deeper gouges. This is where professional floor refinishing comes in, offering a way to restore your floors to their original glory without the expense of a full replacement. Understanding the pros and cons of floor refinishing is crucial for Worcester homeowners. This guide will walk you through the benefits and drawbacks, helping you decide if this is the right investment for your home. We’ll cover everything from cost-effectiveness and aesthetic improvements to the disruption involved and potential limitations. Thinking about giving your floors a new lease on life? Refinishing can dramatically transform your home, but it’s important to weigh the options. Get Free Quote The Pros of Floor Refinishing in Worcester, MA For many Worcester homeowners, the advantages of refinishing their existing hardwood floors far outweigh the alternatives. Here’s a closer look at the key benefits: Cost-Effective Renovation One of the biggest advantages of floor refinishing is its cost-effectiveness compared to replacing your entire hardwood floor. While a full replacement can run into thousands of dollars, refinishing typically costs significantly less, often between $*3 to $*8 per square foot, depending on the condition of the existing floor and the type of finish chosen. This makes it an attractive option for homeowners looking to update their space on a budget. *Pricing varies based on project scope, materials selected, and site conditions. Contact us for a personalized estimate. Restores Beauty and Extends Lifespan Refinishing breathes new life into old, worn-out floors. It removes scratches, scuffs, and dullness, revealing the beautiful natural grain of the wood underneath. This process not only makes your floors look brand new but also protects them from future damage, extending their lifespan by another 10-20 years. According to the National Wood Flooring Association (NWFA), properly maintained hardwood floors can last for generations, with refinishing being a key part of that maintenance. Increases Home Value Hardwood floors are a highly sought-after feature for homebuyers. A professionally refinished floor can significantly increase your home’s appeal and market value. Real estate experts often cite hardwood floors as one of the top features buyers look for, with a strong return on investment for renovations that enhance them. This is especially true in a competitive market like Worcester, where buyers appreciate move-in ready homes with classic features. Customization Options Refinishing isn’t just about restoring; it’s also about reimagining. You have the opportunity to change the stain color, from light and airy to rich and dark, or even opt for a natural, clear finish. You can also choose between different sheens, such as matte, satin, or gloss, to achieve the desired aesthetic for your home. This allows you to update your home’s style without undergoing a complete flooring overhaul. A beautifully refinished red oak hardwood floor can transform an entire living space, bringing warmth and elegance to your Worcester home. The Cons of Floor Refinishing for Worcester Homeowners While the benefits are clear, floor refinishing does come with certain drawbacks that homeowners in Worcester should consider before committing to the project. Temporary Disruption The refinishing process involves sanding, staining, and applying multiple coats of finish, which can take several days to complete. During this time, the area being refinished will be inaccessible, and you may need to vacate your home or at least the affected rooms. This disruption can be inconvenient, especially for families with pets or young children. Plan for temporary living arrangements or restricted access to certain areas of your home. Dust and Odor Despite modern dust containment systems, sanding hardwood floors can generate a significant amount of fine dust. While professional contractors strive to minimize this, some dust is inevitable and will require thorough cleaning afterward. Additionally, the stains and finishes used can produce strong odors, which may linger for a few days even after the project is complete. Proper ventilation is essential during and after the process. Potential Limitations Not all hardwood floors are good candidates for refinishing. Engineered hardwood, for example, has a thinner top layer of real wood (veneer) and can only be refinished a limited number of times, typically 1-3 times, depending on the veneer thickness. Solid hardwood, on the other hand, can be refinished many times over its lifespan. If your floors have deep gouges, significant water damage, or structural issues, refinishing might not be sufficient, and replacement or repair might be necessary. Cost Considerations While generally more affordable than replacement, refinishing is still an investment. The total cost will depend on the size of the area, the condition of your floors, the type of wood, and the chosen finish. For instance, a complex pattern or a specific type of wood like Brazilian cherry might incur higher costs. Always get a detailed estimate from a reputable contractor to understand the full financial commitment. *Pricing varies based on project scope, materials selected, and site conditions. Contact us for a personalized estimate. Professional floor refinishing involves careful preparation and expert application to ensure a durable and beautiful finish. When to Consider Professional Floor Refinishing Deciding when it’s the right time for floor refinishing depends on the condition of your floors and your goals for your home. Here are some common indicators that your floors could benefit from a professional touch: Visible Wear and Tear If your hardwood floors show significant scratches, scuffs, dull spots, or discoloration from sun exposure or heavy foot traffic, refinishing can effectively remove these imperfections. These signs are often most noticeable in high-traffic areas like hallways, living rooms, and kitchens. Water Damage or Stains Minor water damage or stains that haven’t penetrated too deeply into the wood can often be sanded out during the refinishing process. However, extensive water damage might require board replacement
Understanding Floor Refinishing: When to Refinish Your Hardwood Floors in Millbury
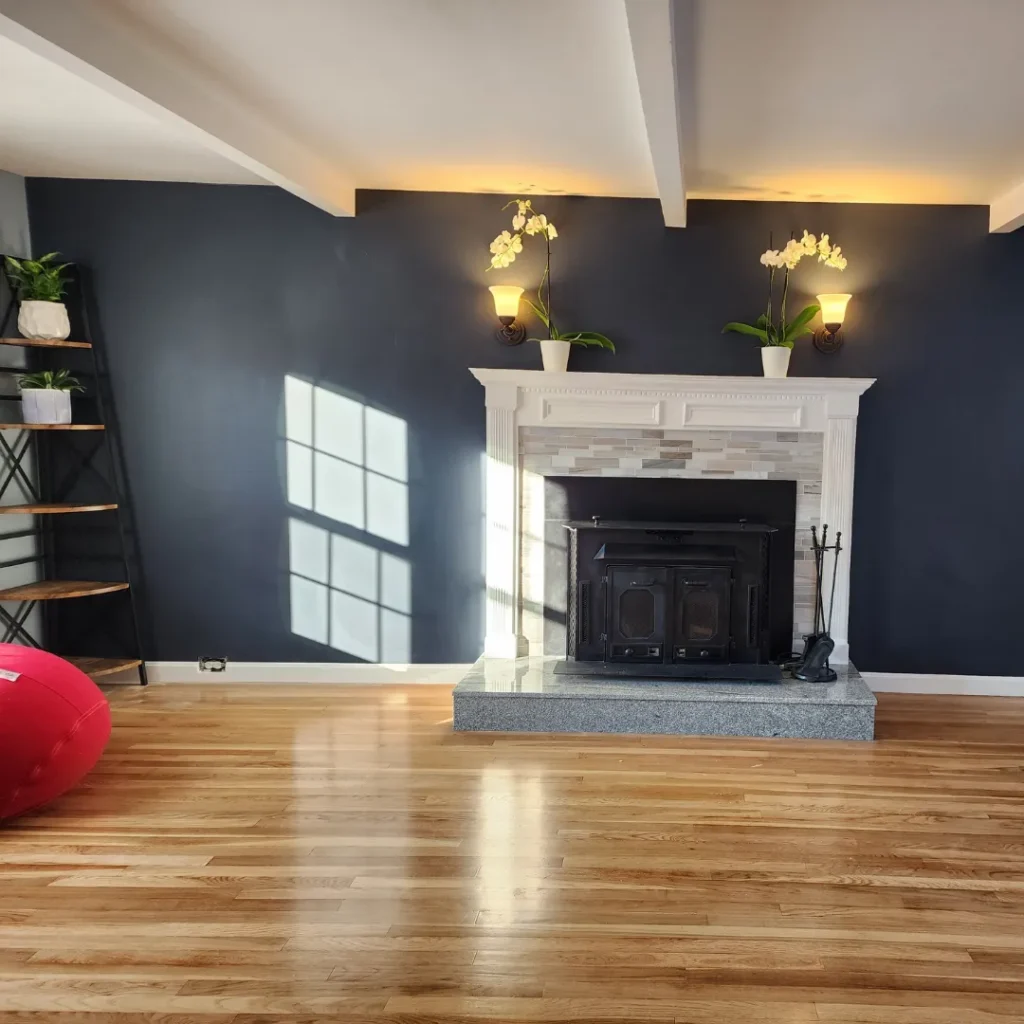
Blog Understanding Floor Refinishing: When to Refinish Your Hardwood Floors in Millbury Serving homeowners in Millbury, MA and surrounding areas Hardwood floors add timeless elegance and value to any home in Millbury, MA. However, over years of foot traffic, pet activity, and general wear and tear, even the most resilient hardwood can start to lose its luster. Knowing when to consider professional floor refinishing is key to preserving your investment and maintaining your home’s aesthetic appeal. This guide will walk you through the common signs that indicate your hardwood floors are ready for a refresh, the benefits of refinishing, and what to expect from the process. If you’re noticing dullness, scratches, or uneven wear, it might be time to restore the beauty of your floors. Ready to restore your hardwood floors? Discover if floor refinishing is the right solution for your Millbury home with a complimentary consultation. Get Free Quote When to Consider Floor Refinishing in Millbury, MA Recognizing the right time for floor refinishing is crucial. Waiting too long can lead to more extensive and costly repairs, while acting proactively can extend the life of your hardwood. Here are the most common indicators that your floors in Millbury, MA are ready for a professional touch. Visible Scratches and Dents One of the most obvious signs that your hardwood floors need attention is the presence of numerous scratches and dents. While minor surface scratches can sometimes be buffed out, deeper gouges that penetrate the wood’s finish and even the wood itself indicate a need for refinishing. These blemishes not only detract from the beauty of your floors but can also accumulate dirt and moisture, potentially causing further damage. Heavy traffic areas, like hallways and living rooms, are particularly prone to this kind of wear. Dull or Faded Appearance Over time, sunlight exposure, cleaning products, and general wear can cause your hardwood floors to lose their vibrant color and shine. If your floors appear dull, lifeless, or have faded patches, especially in areas exposed to direct sunlight, refinishing can bring back their original luster. A fresh coat of stain and sealant can dramatically revitalize the appearance of your entire room. Uneven Wear and Tear Areas with high foot traffic, such as entryways, kitchens, and hallways, often show wear faster than less-used spaces. This can result in an uneven appearance, where some areas are heavily worn down to the bare wood, while others retain their finish. This inconsistency is not only unsightly but also leaves the exposed wood vulnerable to damage. Refinishing can address these inconsistencies, creating a uniform and protected surface across your entire floor. Refinishing can bring back the natural beauty and shine to dull and worn hardwood floors, as seen in this bright bedroom. Water Damage or Stains Accidental spills, pet accidents, or leaks can leave unsightly water stains or dark spots on your hardwood floors. If these stains have penetrated beyond the surface finish into the wood itself, simple cleaning won’t suffice. Refinishing involves sanding down the damaged layers of wood, which can effectively remove most stains and restore the wood’s original color. For significant water damage, it’s crucial to address the source of the moisture before proceeding with refinishing. Gaps Between Boards While minor gaps can be a natural occurrence due to changes in humidity, significant or widening gaps between hardwood boards can indicate underlying issues or a need for repair before refinishing. These gaps can accumulate dirt and debris, and if severe, may affect the structural integrity of the floor. A professional assessment can determine if these gaps can be addressed during the refinishing process or if more extensive carpentry work is required. When to Consider a Full Renovation Instead Sometimes, the damage to your hardwood floors might be too extensive for refinishing alone. If there’s widespread structural damage, severe warping, or multiple boards that are deeply gouged or rotted, a full replacement or a more comprehensive renovation might be necessary. In such cases, exploring options like new vinyl flooring or even a complete kitchen renovation that includes new flooring might be a better long-term solution. The Floor Refinishing Process: What to Expect Understanding the steps involved in professional floor refinishing can help you prepare for the project and appreciate the transformation your floors will undergo. While specific techniques may vary, the core process remains consistent. Step 1: Preparation Before any sanding begins, the room must be completely cleared of furniture, rugs, and any other obstacles. It’s also essential to seal off the area to minimize dust migration to other parts of your home. Any loose boards will be secured, and nails countersunk. This preparatory stage is critical for achieving a smooth and even finish. Step 2: Sanding Sanding is the most labor-intensive part of the process, involving multiple passes with progressively finer grits of sandpaper. The goal is to remove the old finish, stains, and surface imperfections, revealing the clean, raw wood underneath. Professional equipment with dust collection systems is used to minimize airborne particles. Depending on the condition of your floors, this step may take several days. Step 3: Staining (Optional) Once the floors are thoroughly sanded and cleaned, you have the option to apply a wood stain. Staining allows you to change or enhance the color of your hardwood, from light natural tones to dark, rich hues. This is a great opportunity to update your home’s look or match existing decor. If you prefer the natural color of your wood, this step can be skipped. A professionally refinished hardwood floor can dramatically enhance the appearance of a living space, complementing existing decor. Step 4: Sealing and Finishing After staining (or directly after sanding if no stain is used), several coats of a protective finish are applied. This finish not only provides a durable barrier against wear, moisture, and scratches but also gives your floors their desired sheen (matte, satin, semi-gloss, or gloss). Polyurethane is a common choice, known for its durability. Each coat requires adequate drying time, and light sanding may occur
Backsplash Installation Trends: What’s Popular in Holden, MA?
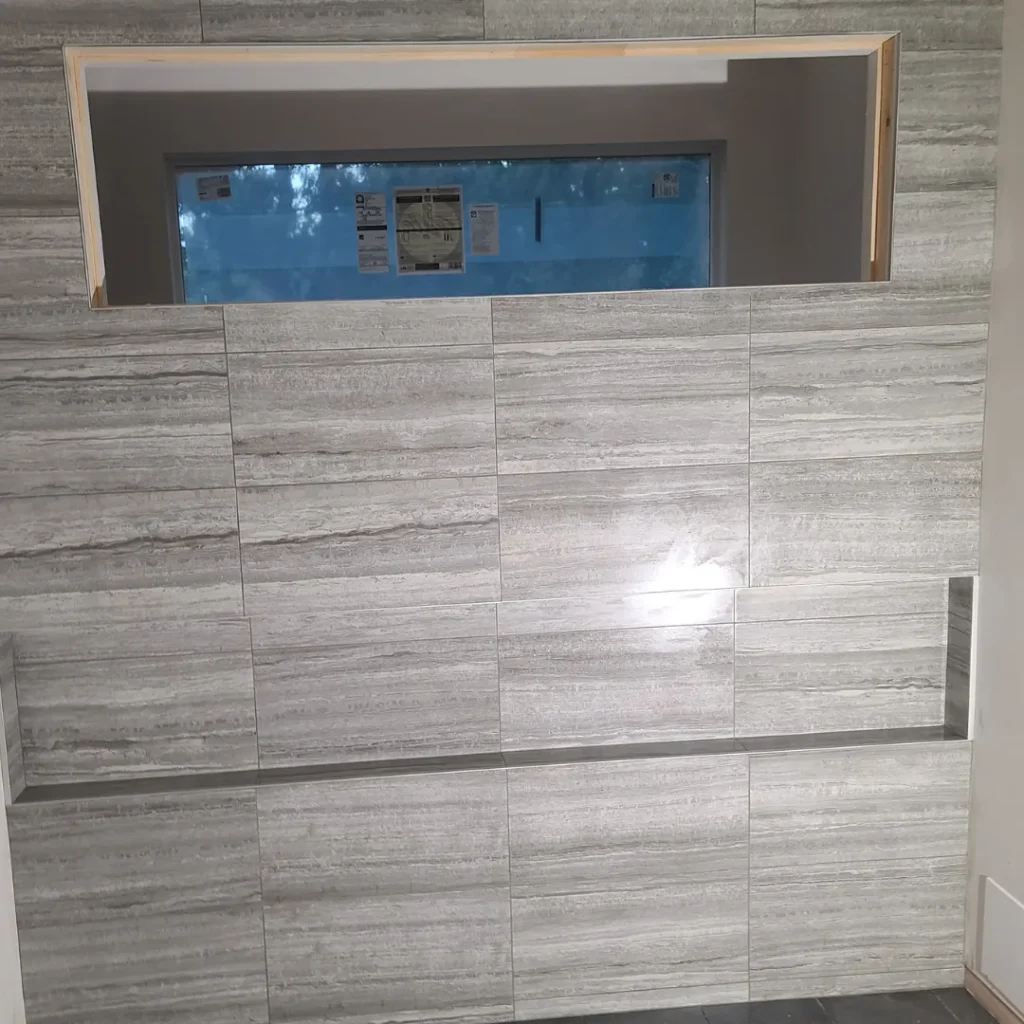
Blog Backsplash Installation Trends: What’s Popular in Holden, MA? Serving homeowners in Holden, MA and surrounding areas In Holden, MA, homeowners are increasingly focusing on the kitchen backsplash as a key design element, transforming it from a purely functional surface into a focal point. Modern backsplash installation trends in Holden, MA, reflect a blend of classic elegance and contemporary style, with an emphasis on durable, low-maintenance materials and patterns that complement diverse kitchen aesthetics. Whether you’re planning a full kitchen renovation or a simple refresh, understanding the current popular backsplash choices can help you make an informed decision that adds value and beauty to your home. From timeless subway tiles to bold geometric patterns, the options are vast and exciting. Thinking about a new backsplash for your Holden home? The most popular backsplash installation trends in Holden, MA, include classic subway tile with updated layouts, large-format porcelain, natural stone, and intricate mosaic patterns, often chosen for their durability and aesthetic versatility. Get Free Quote Embracing Modern Backsplash Installation Trends in Holden, MA Holden homeowners are leaning into backsplashes that offer both visual appeal and practical benefits. Durability, ease of cleaning, and a cohesive look with existing kitchen elements are top priorities. The trends we see aren’t just about what looks good, but what truly enhances daily living. Classic Subway Tile with a Twist Subway tile remains a perennial favorite, but its application is evolving. While the traditional horizontal brick pattern is still popular, Holden residents are exploring new layouts to add fresh appeal. Vertical stacking, herringbone patterns, and basketweave designs are gaining traction, offering a subtle yet impactful update to this timeless choice. White and off-white subway tiles continue to dominate, but homeowners are also experimenting with muted grays, blues, and even subtle patterns to add depth. According to a recent Houzz study, subway tile remains a top choice for kitchen backsplashes, with 54% of renovating homeowners opting for it in 2023. Large-Format Porcelain and Ceramic Tiles For a sleek, minimalist look, large-format porcelain and ceramic tiles are becoming increasingly popular. These larger tiles mean fewer grout lines, resulting in a cleaner aesthetic and easier maintenance. They often mimic the appearance of natural stone like marble or travertine, providing a luxurious feel without the higher cost or upkeep requirements of real stone. These tiles can range in size from 12×24 inches to even larger formats, creating a seamless and expansive backdrop. Natural Stone: Marble and Quartzite For those seeking elegance and a connection to nature, marble and quartzite backsplashes are a premium choice. While requiring a bit more maintenance (sealing is often recommended every 6-12 months, according to the Natural Stone Institute), their unique veining and natural beauty are unmatched. Many homeowners opt for a slab backsplash, extending the countertop material vertically for a truly seamless and dramatic effect. This can significantly elevate the overall aesthetic of your kitchen renovation. A sleek, modern kitchen featuring a dark mosaic backsplash, demonstrating how texture and color can define a space. Materials and Patterns Gaining Traction in Holden Kitchens Beyond the classics, several other materials and patterns are making their mark in Holden kitchens, reflecting a desire for personalized and unique spaces. These choices allow for greater creative expression and can dramatically alter the feel of a kitchen. Patterned and Geometric Tiles Homeowners are increasingly drawn to patterned tiles that add character and a sense of artistry. Geometric shapes like hexagons, arabesques, and intricate Moroccan-inspired patterns are used to create eye-catching backsplashes. These can be in monochromatic tones for a subtle effect or in contrasting colors for a more dramatic statement. These patterns can transform a simple kitchen into a vibrant and dynamic space. Glass Tiles for Luminous Appeal Glass tiles offer a unique reflective quality that can brighten a kitchen and make it feel more expansive. Available in a wide array of colors and finishes, from frosted to glossy, glass backsplashes are durable and easy to clean. They are particularly effective in smaller kitchens or spaces that could benefit from added light and sparkle. Glass tile installations can range from solid color panels to intricate mosaics. Wood-Look and Metal Tiles For a rustic or industrial touch, wood-look porcelain tiles and metal tiles are emerging as interesting options. Wood-look tiles provide the warmth and texture of wood without the maintenance concerns, while metal tiles (such as stainless steel or copper) can add a contemporary, edgy feel. These materials are often used to create accent walls or to define specific zones within the kitchen. Considering a kitchen update? A new backsplash can significantly impact the overall look and feel of your kitchen. Our team specializes in expert tile installation and can help you choose the perfect trend for your home. Factors Influencing Backsplash Choices in Holden, MA When selecting a backsplash for your home in Holden, several practical and aesthetic considerations come into play. These factors help homeowners narrow down their options and ensure the final choice is both beautiful and functional. Budget Considerations Backsplash materials vary widely in price, from cost-effective ceramic tiles to premium natural stone slabs. While a full backsplash installation can range anywhere from $900 to $3,000* for materials and labor, depending on the material and complexity, it’s essential to set a realistic budget. Remember that unusual patterns or delicate materials might increase installation costs due to the specialized labor required. *Pricing varies based on project scope, materials selected, and site conditions. Contact us for a personalized estimate. Kitchen Style and Existing Elements The backsplash should harmonize with your kitchen’s overall design, including cabinets, countertops, and flooring. A modern kitchen might benefit from a minimalist large-format tile, while a farmhouse-style kitchen could be enhanced by classic subway tile or a rustic brick veneer. Consider the color palette and textures already present in your kitchen to ensure a cohesive look. For a complete transformation, consider our comprehensive kitchen renovation services. Maintenance and Durability Kitchens are high-traffic areas, and backsplashes are exposed to splashes and grease. Materials like porcelain and glass
Transform Your Kitchen: A Step-by-Step Guide to Kitchen Renovation in Westborough
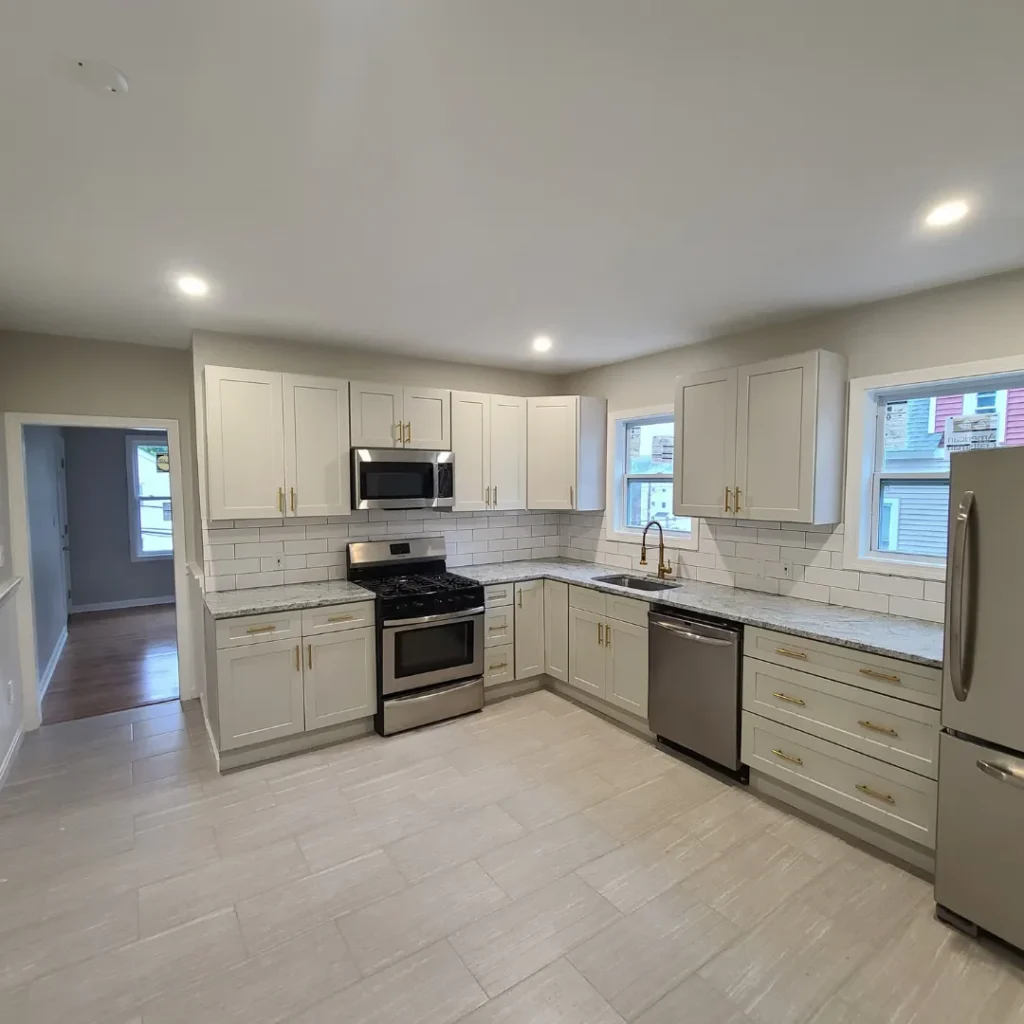
Blog Transform Your Kitchen: A Step-by-Step Guide to Kitchen Renovation in Westborough Serving homeowners in Westborough, MA and surrounding areas The kitchen is often called the heart of the home, and for good reason. It’s where meals are prepared, families gather, and memories are made. If your kitchen in Westborough, MA, is feeling outdated, cramped, or simply not functioning how you need it to, a renovation can be a game-changer. But where do you start? A kitchen renovation can seem like a daunting task, with countless decisions to make, from layout to finishes. This comprehensive guide will walk you through every step of a successful kitchen renovation in Westborough, MA, from initial planning to the final reveal. We’ll cover everything you need to know to achieve your dream kitchen, ensuring a smooth process and a stunning result. Ready to start your kitchen renovation in Westborough, MA? Our team is here to help you design and build the kitchen of your dreams. Get Free Quote Understanding Your Vision: The Foundation of a Westborough Kitchen Renovation Before any hammers swing or cabinets are ordered, the most crucial step in any kitchen renovation project is defining your vision. This isn’t just about picking colors; it’s about understanding how you use your kitchen, what you love, what you hate, and what you aspire for it to be. Assess Your Current Kitchen Functionality: What works well? What doesn’t? Is your “work triangle” (sink, stove, refrigerator) efficient? Storage: Do you have enough? Is it organized? Are there dead spaces you could utilize better? Style: Does it match your home’s aesthetic? Is it dated? What elements do you want to keep or change? Traffic Flow: Is it easy to move around, especially during peak times? Gather Inspiration and Ideas Look through magazines, browse online platforms like Pinterest and Houzz, and visit local showrooms. Pay attention to layouts, cabinet styles, countertop materials, backsplashes, lighting, and flooring. Create an idea board to consolidate your preferences. This step is vital for your kitchen renovation in Westborough, MA, as it helps communicate your desires to your contractor. Define Your Budget Establishing a realistic budget early on is paramount. Kitchen renovations can range widely in cost depending on the scope, materials, and labor. Be honest with yourself about what you can afford, and always factor in a contingency fund (typically 10-15%) for unexpected issues. National bathroom remodels typically run $25,000–$60,000*. *Pricing varies based on project scope, materials selected, and site conditions. Contact us for a personalized estimate. A modern gray shaker kitchen with a quartz waterfall island and a dark mosaic backsplash, showcasing a sleek design that can inspire your Westborough kitchen renovation. Planning and Design: Bringing Your Westborough Kitchen to Life Once you have a clear vision and budget, it’s time to translate those ideas into a concrete plan. This stage involves professional input and detailed decision-making. Work with a Professional Contractor A skilled Massachusetts Home Improvement Contractor (HIC #217695) like Link Services Pro Inc will be your most valuable asset. They can help you refine your design, navigate local building codes, and manage the entire project. Look for a contractor with extensive experience in kitchen renovations in the Westborough area. Develop the Layout and Floor Plan This is where the functionality of your new kitchen takes shape. Consider different layouts (U-shape, L-shape, galley, island) and how they impact workflow and space utilization. Your contractor will help you create detailed floor plans and 3D renderings to visualize the new space. Select Materials and Finishes This is often the most exciting (and sometimes overwhelming) part. You’ll choose everything from cabinets and countertops to flooring and lighting. Cabinets: Consider style (shaker, flat-panel), material (wood, MDF), and finish. Countertops: Popular choices include granite, quartz, marble, and butcher block. Each has unique pros and cons in terms of durability, maintenance, and cost. Backsplash: Tiles, natural stone, or even painted glass can add a personal touch. Flooring: Options range from hardwood and tile to luxury vinyl plank. For more insights, you can explore our guide on tile vs. vinyl plank flooring. Appliances: Decide on the size, style, and functionality of your new refrigerator, oven, dishwasher, and microwave. Lighting: A mix of ambient, task, and accent lighting is crucial for both aesthetics and functionality. Remember to consider how these choices will impact the overall cost of your kitchen renovation. *Pricing varies based on project scope, materials selected, and site conditions. Contact us for a personalized estimate. This white shaker kitchen with a classic subway tile backsplash and granite countertops offers a timeless look that homeowners in Westborough often desire. The Renovation Process: What to Expect During Your Kitchen Remodel With the planning complete, the physical transformation of your kitchen begins. This stage involves several key steps, each with its own timeline. Demolition This is the first and often most dramatic step. Old cabinets, countertops, flooring, and sometimes even walls are removed. This is a messy process, but essential for a clean slate. Link Services Pro Inc is currently offering Free Demolition + Renovations Under $10,000* for eligible projects, making this stage even easier. *Pricing varies based on project scope, materials selected, and site conditions. Contact us for a personalized estimate. Rough-Ins (Plumbing, Electrical, HVAC) Once demolition is complete, any necessary changes to plumbing, electrical wiring, and HVAC systems are made according to the new layout. This includes moving outlets, installing new light fixtures, and ensuring proper ventilation. Insulation and Drywall After rough-ins are inspected, insulation is installed, followed by drywall. Once the drywall is in place, it’s taped, mudded, and sanded to create smooth walls, ready for painting. Flooring Installation Depending on your chosen material, flooring is typically installed before cabinets or after. This stage can dramatically change the feel of the space. Whether you’re opting for tile installation or vinyl flooring, professional installation is key for durability and appearance. Cabinet Installation Your new cabinets are installed, starting with the base units and then the wall cabinets. This is a critical step that sets the foundation
Tile vs Vinyl Plank Flooring: Which Is Right for Your Worcester Home?
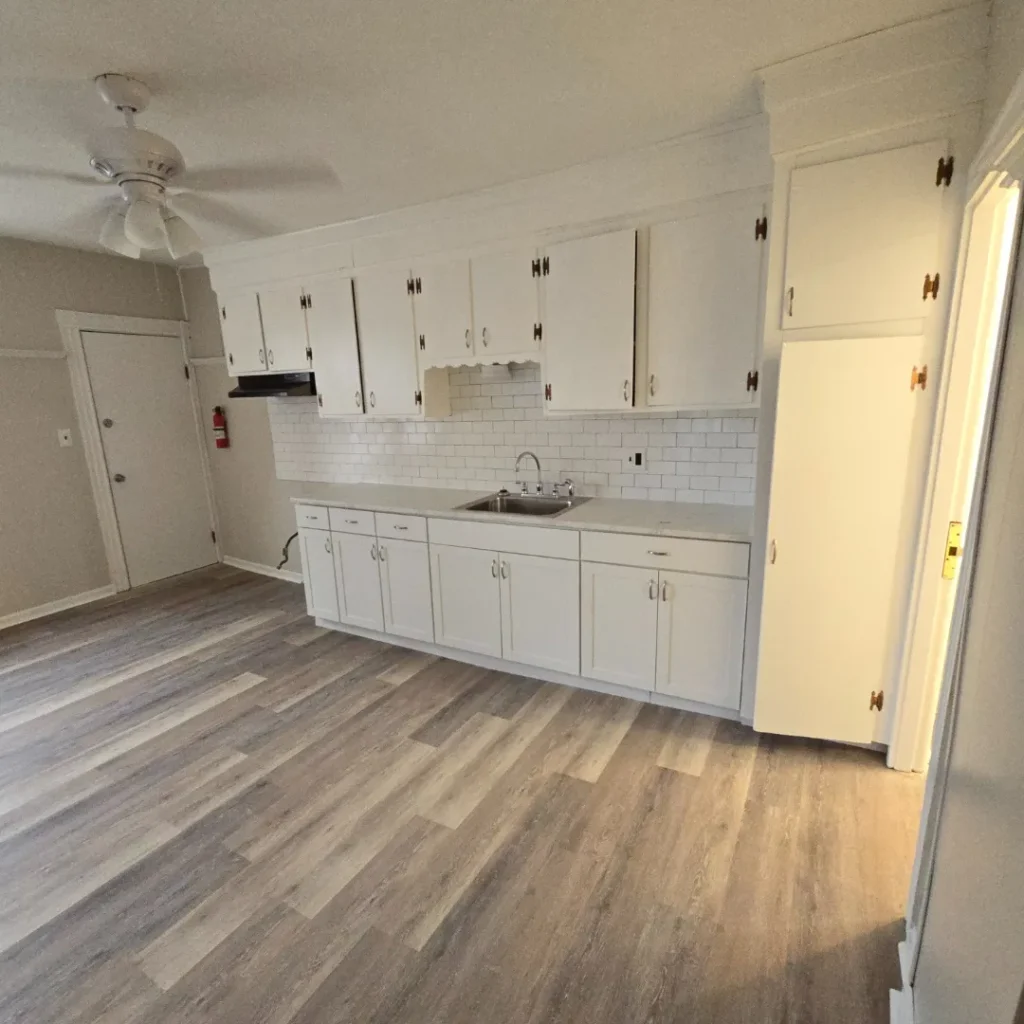
Blog Tile vs Vinyl Plank Flooring: Which Is Right for Your Worcester Home? Serving homeowners in Worcester, MA and surrounding areas Choosing the right flooring for your home is a big decision, especially in high-traffic areas like kitchens and bathrooms. In Worcester, MA, homeowners often weigh the pros and cons of two popular options: traditional tile and modern vinyl plank flooring. Both offer distinct advantages in terms of durability, aesthetics, maintenance, and cost. This guide will break down the key differences between tile and vinyl plank flooring, helping you decide which material best suits your lifestyle, budget, and the specific needs of your Worcester home. Whether you’re renovating a kitchen, updating a bathroom, or refreshing a living space, understanding these differences is crucial for a successful project. Considering new flooring for your Worcester home? Get a personalized consultation and a clear estimate from our experienced team. We’re currently offering Free Demolition + Renovations Under $10,000*! Get Free Quote *Pricing varies based on project scope, materials selected, and site conditions. Contact us for a personalized estimate. Understanding Tile vs Vinyl Flooring for Kitchens and Beyond When it comes to durability and style, both tile and vinyl plank flooring have evolved significantly. Tile, particularly porcelain, is renowned for its strength and water resistance. Vinyl plank flooring, especially Luxury Vinyl Plank (LVP) or Luxury Vinyl Tile (LVT), mimics natural materials with impressive realism and offers a comfortable, resilient surface. Tile Flooring: The Classic Choice Tile, encompassing ceramic and porcelain, has been a staple in homes for centuries. Its enduring popularity is due to a combination of factors, making it a strong contender for many Worcester households. Durability: Porcelain tile is incredibly hard-wearing, resistant to scratches, dents, and heavy foot traffic. It’s an excellent choice for busy areas. Water Resistance: Glazed ceramic and porcelain tiles are virtually impervious to water, making them ideal for bathrooms, kitchens, and basements where moisture is a concern. Aesthetics: Available in an endless array of colors, patterns, sizes, and finishes, tile can replicate the look of natural stone, wood, or concrete. Intricate mosaic designs and large-format tiles offer vast design possibilities. Longevity: Properly installed tile can last for decades, often outliving other flooring types. Value: Tile can add significant resale value to your home due to its perceived quality and durability. Vinyl Plank Flooring: The Modern Contender Vinyl plank flooring has rapidly gained popularity as a versatile and high-performance alternative to traditional materials. Modern manufacturing techniques have transformed vinyl into a sophisticated and attractive option for any room. Waterproof: Many LVP products are 100% waterproof, making them a fantastic choice for kitchens, bathrooms, laundry rooms, and basements. Comfort: Vinyl plank offers a softer, warmer feel underfoot compared to tile, which can be a significant comfort factor, especially in colder climates like Massachusetts. Sound Dampening: The resilient nature of vinyl helps to absorb sound, contributing to a quieter home environment. Installation: Often featuring click-lock systems, vinyl plank can be quicker and less labor-intensive to install than tile, potentially reducing installation costs*. Realistic Looks: Advanced printing technology allows vinyl plank to convincingly mimic the appearance of hardwood, stone, and other natural materials, complete with texture and grain. *Pricing varies based on project scope, materials selected, and site conditions. Contact us for a personalized estimate. Tile flooring offers a classic, durable surface that can mimic natural stone, perfect for a traditional kitchen aesthetic. Key Differences: Cost, Durability, Maintenance, and Aesthetics To help you make an informed decision for your Worcester home, let’s dive deeper into the specific aspects where tile and vinyl plank flooring diverge. Cost Considerations The initial investment is often a major factor. Generally, vinyl plank flooring tends to have a lower material cost than tile. Material Cost: Vinyl plank materials typically range from $2* to $7* per square foot, while tile (ceramic and porcelain) can range from $3* to $15+* per square foot, depending on the type and complexity. Installation Cost: Tile installation is more labor-intensive, requiring specialized tools and skills for cutting, laying, and grouting. This can lead to higher installation costs, often ranging from $5* to $14* per square foot. Vinyl plank installation, especially with click-lock systems, can be less expensive, usually $2* to $8* per square foot. Long-term Value: While tile has a higher upfront cost, its exceptional longevity and minimal need for replacement can make its long-term cost-effectiveness comparable, or even superior, to vinyl. *Pricing varies based on project scope, materials selected, and site conditions. Contact us for a personalized estimate. Durability and Lifespan Both options are durable, but in different ways. Tile: Highly resistant to scratches, fading, and fire. Porcelain is extremely hard and can withstand heavy impacts. However, individual tiles can crack or chip if a heavy object is dropped, requiring replacement. Vinyl Plank: Excellent resistance to scratches, dents, and stains due to its protective wear layer. Many modern LVP products are designed to withstand significant wear and tear. While durable, it may not last as long as porcelain tile, with an average lifespan of 15-25 years compared to tile’s 50+ years. Maintenance and Cleaning Both flooring types are relatively low-maintenance, but there are nuances. Tile: Easy to clean with sweeping, vacuuming, and mopping. The main maintenance concern is grout lines, which can attract dirt and require occasional sealing or deep cleaning. Vinyl Plank: Very easy to clean with a broom, vacuum, or damp mop. Its seamless surface (especially with waterproof options) means no grout lines to worry about, simplifying upkeep. Aesthetics and Design Versatility Both offer incredible design flexibility. Tile: Offers a vast range of authentic looks, from rustic terracotta to sleek polished marble. It’s often preferred for a high-end, classic, or natural stone aesthetic. The ability to create custom patterns with different tile shapes and sizes is a significant advantage. Vinyl Plank: Excels at replicating the look of hardwood and natural stone, often at a fraction of the cost. The visuals are incredibly convincing, and the texture can mimic real wood grain or stone feel. It’s a great choice for
How Long Does a Bathroom Remodel Actually Take? A Massachusetts Contractor’s Timeline
Blog How Long Does a Bathroom Remodel Actually Take? A Massachusetts Contractor’s Timeline Serving homeowners in Worcester, Shrewsbury, Westborough, Holden, Auburn, and surrounding areas. Dreaming of a new bathroom but dreading the disruption? One of the most common questions we hear at Link Services Pro Inc. is, “how long does a bathroom remodel take?” It’s a valid concern, as a bathroom renovation impacts a crucial part of your daily routine. The truth is, there’s no single answer, but understanding the typical timeline and influencing factors can help you plan effectively. From initial design to the final touches, a bathroom remodel involves several stages, each with its own duration. As experienced Massachusetts Home Improvement Contractor (HIC #217695), we’re here to break down what to expect so you can approach your project with confidence. Ready to transform your bathroom? Get a transparent estimate and a clear timeline for your project. Plus, ask about our Free Demolition + Renovations Under $10,000* offer! Get Free Quote *Pricing varies based on project scope, materials selected, and site conditions. Contact us for a personalized estimate. Understanding the Bathroom Remodel Timeline: Key Phases The overall duration of a bathroom remodel largely depends on the project’s scope, the complexity of the design, and the availability of materials. However, most projects follow a similar progression of phases: Phase 1: Planning & Design (1-4 Weeks) Initial Consultation: Discussing your vision, needs, and budget with a contractor. Design & Material Selection: Choosing layouts, fixtures, tiles, vanity, lighting, and other finishes. This can be the most time-consuming part, especially if you’re undecided or waiting for custom orders. Permits: Depending on the scope of work (e.g., moving plumbing or electrical), permits may be required, adding a few days to several weeks. This initial phase is crucial for setting realistic expectations and ensuring a smooth renovation. Taking your time here can prevent costly delays later on. Phase 2: Demolition & Rough-In (3-7 Days) Demolition: Tearing out old fixtures, flooring, and walls. This is often quicker than you might expect, especially with a professional team. Rough-In Work: This involves adjusting or installing new plumbing lines, electrical wiring, and HVAC ducts behind the walls. Inspections may be required at this stage. The demolition process can be messy, but our team takes care to protect your home and minimize dust. For projects involving significant changes, like moving a toilet or shower, the rough-in work is essential and requires careful planning. A typical bathroom remodel involves careful planning, demolition, and the installation of new fixtures and finishes. Phase 3: Installation (1-3 Weeks) Flooring & Wall Preparation: Ensuring surfaces are ready for new finishes. Tile Installation: Laying floor and shower tiles, followed by grouting. This is a skilled job that requires precision and drying time. Our team excels in professional tile installation for any bathroom design. Bathtub/Shower Installation: Setting the new tub or shower pan and surround. Drywall & Painting: Repairing or installing new drywall, followed by priming and painting. Check out our painting services for a flawless finish. This is where your new bathroom starts to take shape. Each step has specific drying and curing times that cannot be rushed, ensuring the longevity and quality of the finish. Phase 4: Finishing Touches (3-7 Days) Vanity & Countertop Installation: Setting the new vanity cabinet and countertop. Fixture Installation: Installing the toilet, sink, faucet, showerhead, and other plumbing fixtures. Lighting & Electrical: Installing light fixtures, outlets, and switches. Mirror & Accessories: Adding mirrors, towel bars, and other decorative elements. Final Cleanup & Inspection: A thorough cleaning and a final walkthrough to ensure everything meets your expectations. The final phase brings all the elements together, transforming your space into the functional and beautiful bathroom you envisioned. Factors That Influence How Long a Bathroom Remodel Takes While the above provides a general framework, several factors can significantly impact your bathroom remodel timeline: Scope of the Project This is the biggest determinant. A cosmetic update (new paint, vanity, fixtures) will naturally take less time than a complete gut renovation that involves moving walls, plumbing, and electrical. A full bathroom remodeling project typically takes longer due to the extensive work required. Material Availability & Lead Times Custom cabinets, specialty tiles, or unique fixtures can have long lead times. If these aren’t ordered well in advance, they can cause significant delays. Standard, in-stock materials will generally speed up the process. Unexpected Issues Older homes, in particular, can hide surprises behind walls, such as mold, water damage, or outdated wiring/plumbing not up to current code. Addressing these issues adds time (and potentially cost*) to the project. *Pricing varies based on project scope, materials selected, and site conditions. Contact us for a personalized estimate. Contractor’s Schedule & Efficiency A reputable and organized contractor with an experienced team can manage the project more efficiently, minimizing downtime. Our Massachusetts Home Improvement Contractor (HIC #217695) team at Link Services Pro Inc. prides itself on clear communication and streamlined project management. From tile to fixtures, a professional installation ensures a high-quality finish and adherence to the project timeline. Average Bathroom Remodel Durations in Massachusetts Based on our experience serving communities like Worcester, Shrewsbury, and Westborough, here’s a general idea of how long different types of bathroom remodels typically take: Small Bathroom or Powder Room Update (1-2 Weeks) This usually involves cosmetic changes such as new paint, a new vanity, toilet, and light fixtures. Minimal plumbing or electrical work is typically involved. Mid-Range Bathroom Remodel (2-4 Weeks) This includes replacing most fixtures, new flooring, new tile in the shower, and potentially minor layout changes. It’s a popular option for homeowners looking for a significant refresh without major structural alterations. Master Bathroom or Full Gut Renovation (4-8 Weeks) These projects often involve moving walls, reconfiguring the layout, relocating plumbing, and installing high-end finishes. Custom showers, freestanding tubs, and intricate tile work can extend the timeline. Pro Tip: Always add a buffer of 1-2 weeks to any estimated timeline for unforeseen circumstances. Good communication with your contractor is key to navigating any delays
How Much Does a Bathroom Remodel Cost in Worcester County, MA? A 2026 Guide

Blog How Much Does a Bathroom Remodel Cost in Worcester County, MA? A 2026 Guide Serving homeowners in Worcester, Westborough, Shrewsbury, Holden, Auburn, and surrounding areas. Considering a bathroom remodel in Worcester County, MA? It’s an exciting project that can significantly enhance your home’s value and your daily comfort. However, one of the first questions homeowners ask is, “How much does a bathroom remodel cost in Worcester MA?” The answer isn’t always straightforward, as prices can fluctuate widely based on the scope of work, materials chosen, and the specific upgrades you envision. This comprehensive guide will break down the typical costs associated with bathroom remodels in the Worcester County area for 2026. We’ll explore factors that influence pricing, different remodel tiers, and how to get the most value for your investment. By the end, you’ll have a clearer understanding of what to expect and how to plan your budget effectively. Ready to transform your bathroom? Contact us today for a personalized, no-obligation estimate tailored to your vision and budget. Get Free Quote Understanding Bathroom Remodel Costs in Worcester MA The cost of a bathroom remodel in Worcester County, MA, can range from a few thousand dollars for a minor update to tens of thousands for a complete luxury overhaul. Several key factors contribute to these variations, making it crucial to understand what influences the final price tag. Factors Influencing Bathroom Remodel Costs Size of the Bathroom: A small powder room will naturally cost less to remodel than a large master bathroom. More square footage means more materials and labor. Scope of Work: Are you simply replacing fixtures and repainting, or are you moving walls, relocating plumbing, and installing custom cabinetry? The more extensive the changes, the higher the cost. Material Choices: This is one of the biggest cost drivers. High-end tiles, custom vanities, granite or quartz countertops, and designer fixtures will significantly increase your budget compared to standard, off-the-shelf options. Labor Costs: Skilled tradespeople (plumbers, electricians, tile setters, carpenters) are essential for a quality remodel. Labor rates vary, and complex installations require more time. Plumbing and Electrical Work: Relocating existing plumbing or adding new electrical outlets and lighting can add considerable expense due to the specialized labor and potential need for permits. Demolition: While often overlooked, the cost of safely removing old fixtures, tiles, and debris needs to be factored in. Remember our current offer for Free Demolition + Renovations Under $10,000*! *Pricing varies based on project scope, materials selected, and site conditions. Contact us for a personalized estimate. Typical Bathroom Remodel Tiers and Their Costs* To provide a clearer picture of what you can expect, we’ve broken down bathroom remodels into three common tiers based on their scope and typical investment levels in Worcester County. 1. Minor Refresh / Cosmetic Update This tier focuses on aesthetic improvements without changing the layout or major structural elements. It’s ideal for homeowners looking to update the look and feel of their bathroom on a tighter budget. Scope: Repainting, replacing a vanity and sink, updating the toilet, replacing light fixtures, regrouting existing tile, or installing a new showerhead. Materials: Budget-friendly options, off-the-shelf fixtures, basic paint. Typical Cost*: $5,000 – $15,000*. *Pricing varies based on project scope, materials selected, and site conditions. Contact us for a personalized estimate. Even a compact bathroom can feel completely new with a cosmetic refresh, focusing on updated fixtures and fresh finishes. 2. Mid-Range Remodel A mid-range remodel involves more significant changes, often including replacing major fixtures, new flooring, and possibly a new shower or bathtub. The layout might remain similar, but the quality of materials and finishes is a step up. Scope: Replacing the tub/shower combo, new tile flooring, new vanity with a mid-grade countertop, new toilet, updated lighting, and fresh paint. Some minor plumbing adjustments might be included. Materials: Mid-grade porcelain or ceramic tiles, solid surface or basic quartz countertops, better quality fixtures. Typical Cost*: $15,000 – $35,000*. *Pricing varies based on project scope, materials selected, and site conditions. Contact us for a personalized estimate. Special Offer: Don’t forget our current promotion! We offer Free Demolition + Renovations Under $10,000* to help kickstart your mid-range bathroom transformation. 3. High-End / Luxury Remodel This tier represents a complete transformation, often involving a new layout, custom features, high-end materials, and significant plumbing or electrical work. It’s about creating a spa-like retreat. Scope: Moving walls, relocating plumbing, custom walk-in shower with multiple showerheads, freestanding tub, double vanity with custom cabinetry and high-end countertops, heated floors, designer lighting, and smart technology integration. Materials: Natural stone tiles (marble, granite), custom-built cabinetry, high-end quartz or exotic stone countertops, premium fixtures, and advanced lighting systems. Typical Cost*: $35,000 – $70,000+*. *Pricing varies based on project scope, materials selected, and site conditions. Contact us for a personalized estimate. A luxury remodel can include features like curb-free showers, intricate tile work, and custom-designed elements for a truly unique space. Maximizing Value in Your Worcester County Bathroom Remodel Regardless of your budget, there are strategies to ensure you get the most value out of your bathroom remodel. A smart approach to planning and material selection can make a significant difference. Smart Planning and Design Define Your Goals: Clearly outline what you want to achieve with the remodel. Is it purely aesthetic, or do you need improved functionality or accessibility? Prioritize: Decide which elements are most important to you. If a luxurious shower is a must-have, you might save on other areas like the vanity or flooring. Consider the Layout: Keeping your existing plumbing layout can save thousands. Moving toilets, showers, or sinks significantly increases costs due to extensive plumbing work. Get Multiple Quotes: Always obtain detailed quotes from several reputable contractors. Ensure each quote specifies materials, labor, and any potential hidden costs. Material Selection Strategies Mix High and Low: Splurge on one or two “wow” elements (like a unique tile backsplash or a high-end faucet) and save on others (like a more standard vanity or less expensive floor tile). Durability Over Trendiness: Choose materials that are